Thermomix Recipes · October 10, 2026 · 13 min read
Pain Aux Raisins Recipe with a Thermomix
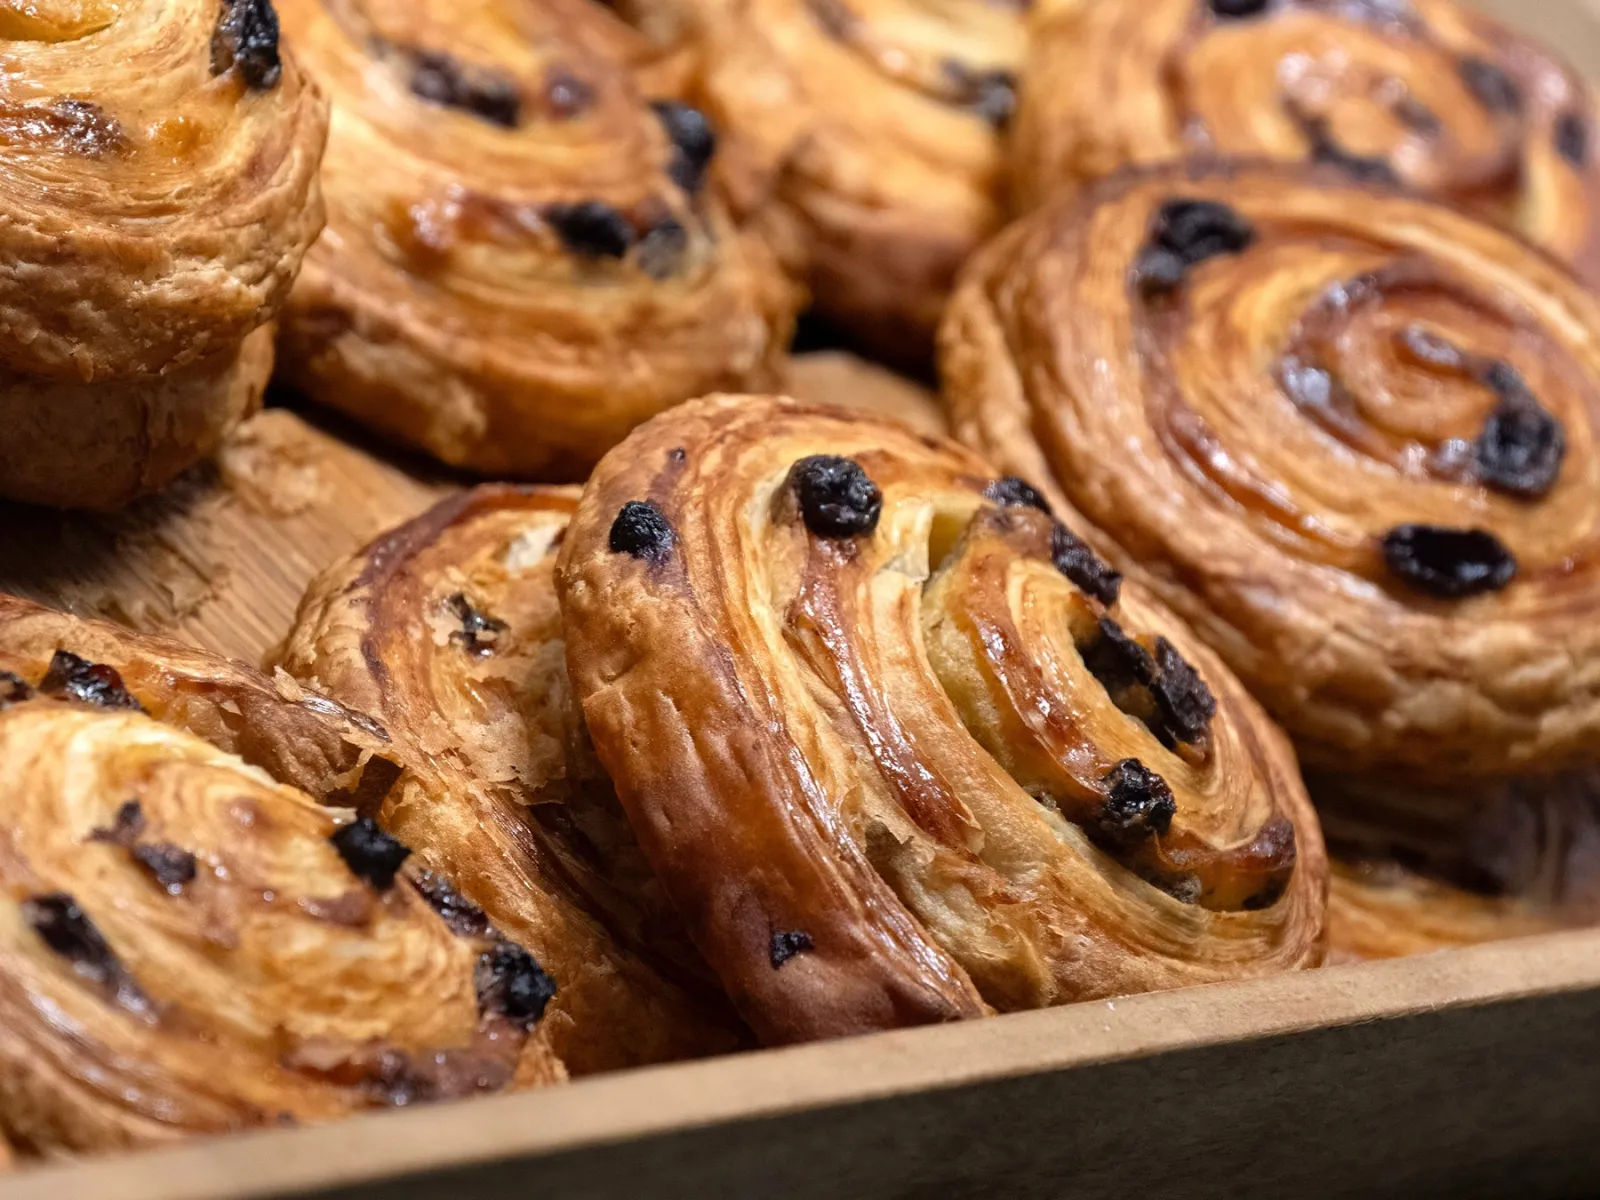
You've got flour on the counter, raisins waiting in a bowl, and a very reasonable question: why does a breakfast pastry need this much attention? Pain aux raisins looks friendly, but the spiral hides a serious little baking project.
On this page
- Why Pain Aux Raisins Is Worth the Effort
- Ingredients and Equipment for the TM7 Kitchen
- Mixing and Kneading the Dough in the TM7
- Lamination, Folds, and Chilling the Butter Block
- Rum Pastry Cream and Assembling the Spirals
- Proofing, Baking, and Glazing to a Golden Crust
- Troubleshooting the Most Common Home Baker Problems
You've got flour on the counter, raisins waiting in a bowl, and a very reasonable question: why does a breakfast pastry need this much attention? Pain aux raisins looks friendly, but the spiral hides a serious little baking project. The good news is that the Thermomix® TM7™ handles the mixing, kneading, pastry cream, and cooking work. You'll handle the rolling, folding, chilling, shaping, and oven.
I'm Prinal Glassman, an Independent Thermomix® Consultant in Las Vegas helping families across the USA. My motto is, “Thermomix? It's a chef… I'm not!” I'm not a chef, and I don't run cooking classes. I do know that laminated dough rewards calm decisions, cool butter, and refusing to bully dough that wants a rest.
Why Pain Aux Raisins Is Worth the Effort
Pain aux raisins belongs to the French viennoiserie family, alongside other enriched and laminated pastries. In France, you may also hear it called an escargot, because the rolled spiral resembles a snail. Historical names include pain russe, raisin brioche, and schneck, and the pastry's exact origin can't be assigned to one inventor or one definitive date. A written milestone appears in Darenne and Duval's Traité de Pâtisserie Moderne, published in 1909, although that recipe didn't exactly match the modern version. The formula evolved over time, which explains why different bakeries and recipes can look surprisingly different. Le Monde's history of pain aux raisins gives useful context for that changing tradition.
The modern pastry has a clear identity: yeast-fermented dough, butter lamination, pastry cream, and raisins. Yeast gives the dough lift, folded butter creates distinct layers, pastry cream adds moisture and richness, and raisins bring concentrated sweetness with a chewy bite. That combination is why this isn't merely a raisin bun. A recipe that skips both yeast fermentation and repeated butter folding may still make a delicious raisin pastry, but it isn't the classic French-style format.
My honest recommendation: Treat this as a relaxed project bake, not a weeknight shortcut.
The TM7 removes much of the tiring hand kneading, but it can't hurry butter into the right consistency or make a warm dough behave. You'll need several chilling windows, careful rolling, and an oven for the final bake. The payoff is a pastry with a soft, bread-like interior, crisp edges, creamy filling, and a visible spiral that looks far more complicated than the TM7 makes the dough work feel.
Ingredients and Equipment for the TM7 Kitchen
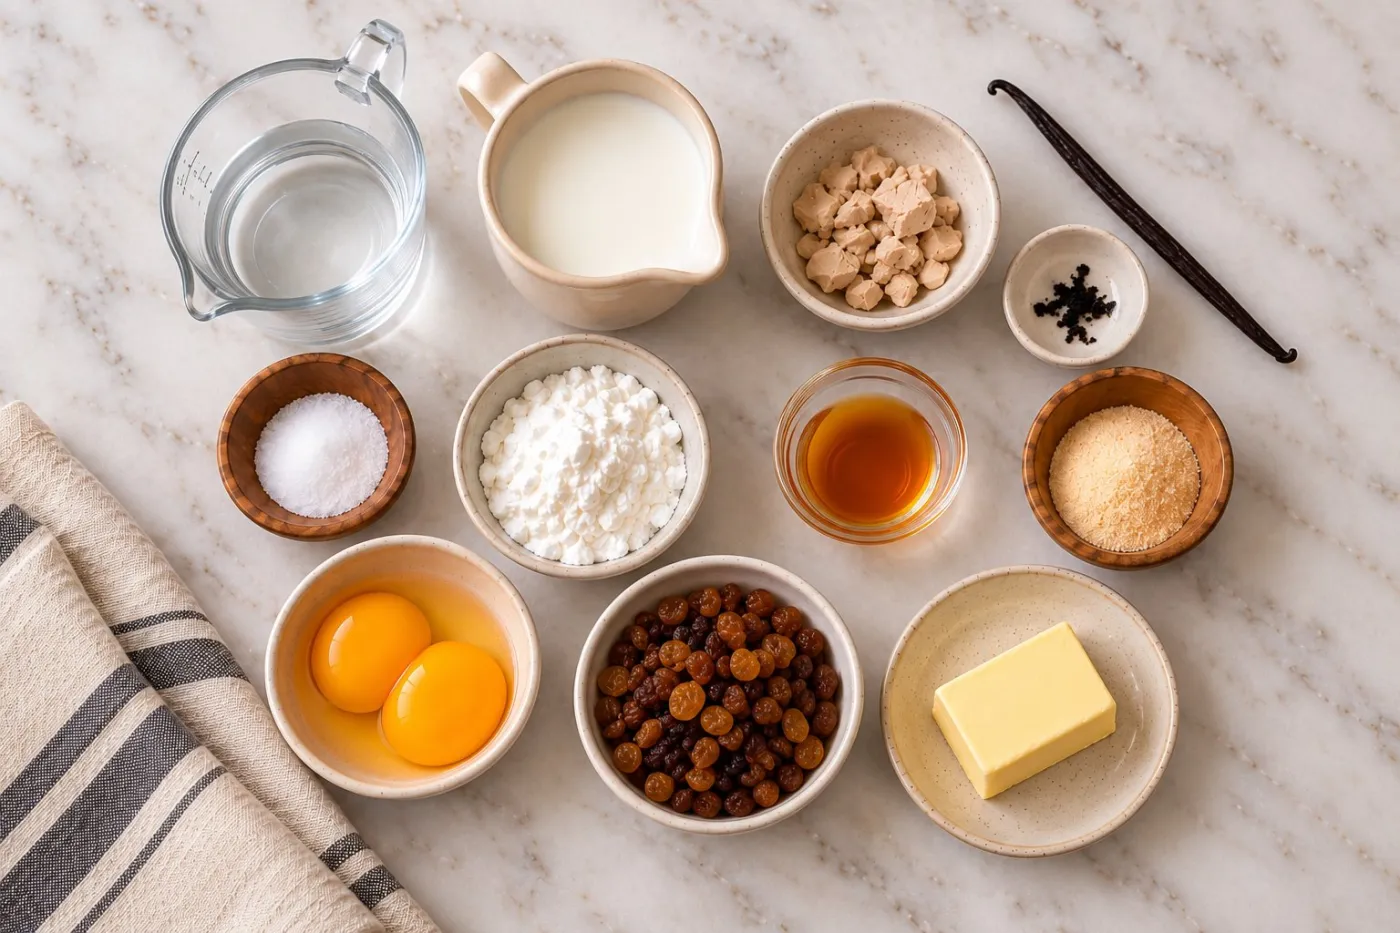
Set everything out before you touch the bowl. Pain aux raisins gets easier the moment your flour is weighed, your butter is sorted, your raisins are ready, and you've cleared space in the fridge for chilling trays and dough.
Dough | Pastry cream |
|---|---|
All-purpose flour, 6 cups (750 g) | Whole milk, 2 cups (480 g) |
Active dry yeast, 2 packets (14 g) | Egg yolks, 4 yolks (74 g) |
Granulated sugar, ½ cup (110 g) | Granulated sugar, ⅓ cup (72 g) |
Whole milk, ¼ cup (70 g) | Cornstarch, 1½ tablespoons (12 g) |
Salt, 1 tablespoon (18 g) | Vanilla bean paste, ½ teaspoon |
Soft butter, 3 tablespoons plus ¾ teaspoon (53 g) | Salt, ½ teaspoon |
Eggs, 2 large (100 g) | Dark rum, 1 tablespoon (15 g) |
Roll-in butter, about 2 cups plus 1 tablespoon (490 g) | Raisins, 1 cup (165 g) |
A few small choices matter here. Use whole milk for the pastry cream so the custard cooks up smooth and rich in the TM7 bowl. Soak the raisins if you like, but drain and dry them well before assembly. Any extra moisture will loosen the cream and make the spirals slide when you roll.
Butter texture matters just as much as butter quantity. Your roll-in butter should feel cool and flexible, not greasy, brittle, or hard enough to crack under the rolling pin. If it bends slightly when pressed and stays in a clean slab, you're in the right zone for lamination.
For equipment, keep it simple. You need plastic wrap, a ruler, a rolling surface, and a lined oven tray. The ruler is not fussy. It keeps your rectangle even, which gives you neater spirals and more consistent baking.
If you want a quick overview of what the Thermomix can do, it helps explain why this machine is so useful for a pastry like this. For this recipe, the TM7 handles the dough mix, kneading, and the rum pastry cream in one bowl, while the oven finishes the job.
Use a shop the Thermomix TM7 link if you need the appliance details, but don't expect the machine to replace setup. It saves your hands. It does not replace cold butter, a flat rolling area, or good timing.
Calm prep gives you the best shot at clean layers later.
Mixing and Kneading the Dough in the TM7
Start warmer than your butter stage, but not hot. In the TM7, you want a dough that comes together fast, kneads cleanly, and still feels soft enough to roll later. If you add extra flour now just because it sticks a little, you make lamination harder and the baked spirals heavier.
Add the warm water, yeast, and a pinch of the sugar to the bowl and run:
2 min / 98°F / speed 2
You're looking for a lightly creamy mixture with a fresh yeasty smell. Big foam is not the goal. Add the flour, remaining sugar, salt, milk, eggs, and soft butter, then mix:
2 min / 98°F / speed 2
The dough should look shaggy with no dry patches. Scrape the bowl if flour is hiding at the sides, then switch to:
8 min / kneading mode
Let the machine do the work. That is the whole point of making viennoiserie in a TM7. You skip hand kneading, but you still need to judge the dough like a baker.
By the end of kneading, the dough should be smoother, elastic, and only slightly tacky. It should cling a bit without flowing like batter. Pull off a small piece and stretch it gently between your fingers. If it thins enough to let light through before it tears, you're in good shape. If it rips right away, give it a little more kneading time. If it feels greasy or warm, stop and chill it before you do anything else.
Practical rule: Keep the dough soft and workable. A slightly tacky dough rolls better later than a stiff one.
Turn the dough onto a lightly floured surface and press it into a neat rectangle instead of a round ball. That shape chills faster and sets you up for cleaner lock-in later. Wrap it in plastic wrap and refrigerate until cold and firm.
This dough is not ordinary enriched bread dough. It is mixed to support layers, so your real checkpoint is compatibility with the butter you'll laminate in next. If the dough feels cool, flexible, and calm, you're ready. If it still feels puffy, loose, or warm from the bowl, give it more fridge time. Home bakers usually panic here and rush ahead. Don't.
Lamination, Folds, and Chilling the Butter Block
Lamination demands your full attention, and the simplest rule is to watch the butter. TM7 owners already saved effort on mixing and kneading. This stage is about matching dough temperature to butter texture so the layers stay separate instead of blending into a rich bread dough.
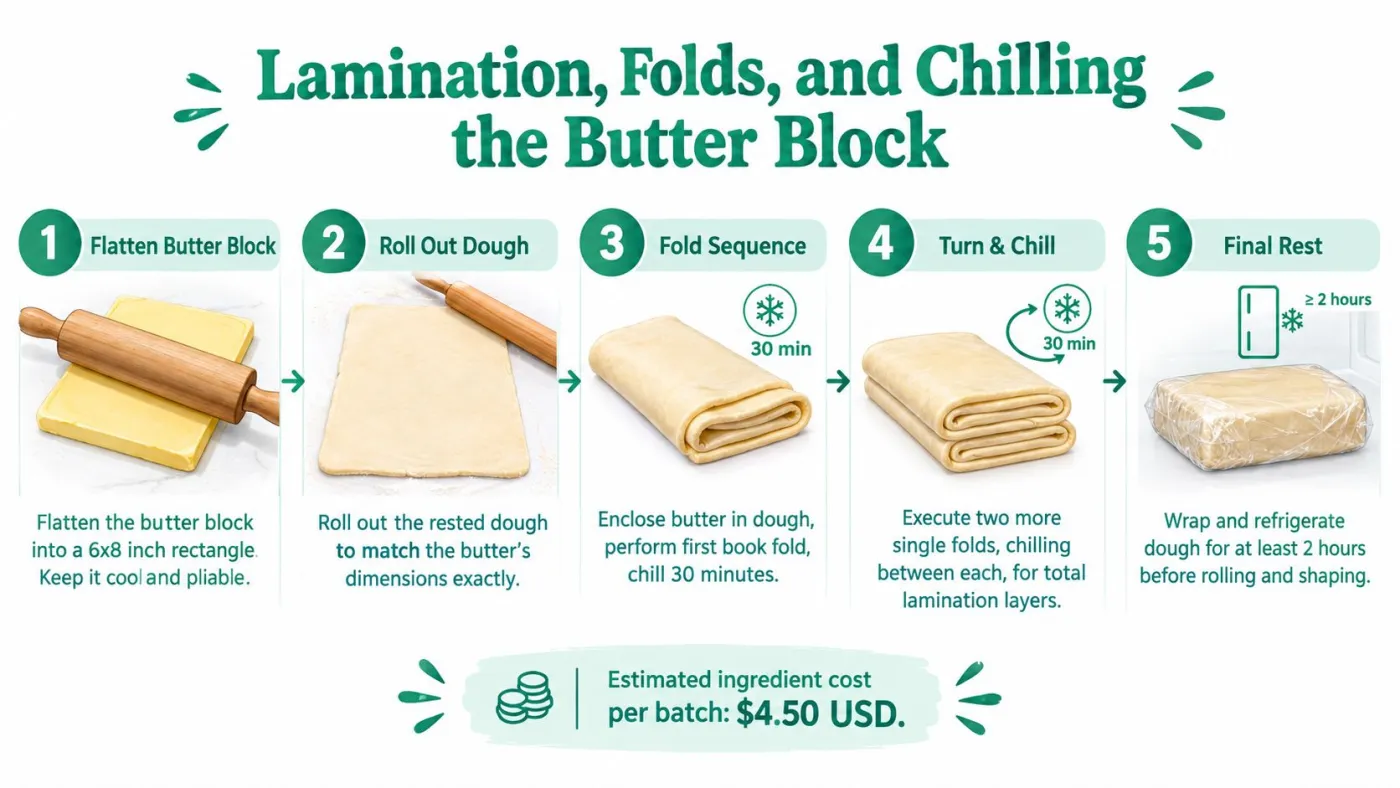
Shape the roll-in butter into a rectangle approximately 6 by 8 inches. It should feel cool and plastic. You want a block that bends under the rolling pin without snapping at the edges, but never looks glossy or oily. A useful working range is approximately 54°F to 61°F, or about 12°C to 16°C, for pliable roll-in butter. If it cracks, let it sit briefly. If it smears, chill it. That simple check matters more than forcing the clock.
Roll the chilled dough into a rectangle large enough to fully enclose the butter. Set the butter in the center, fold the dough over it, and seal the edges well so the block stays trapped inside. Then roll the packet to approximately 8 mm thick. Use steady pressure and keep the corners squared off. If you bear down too hard, the butter will break through and you will spend the rest of the process patching leaks instead of building clean layers.
Complete a quarter-fold, then refrigerate the dough for 30 minutes. Repeat the rolling and folding process for a second quarter-fold, with another 30-minute refrigerated rest between turns. Keep the shape rectangular each time you roll. If the dough retracts sharply, stop and chill it. If the butter turns shiny, stop and chill it. If butter starts peeking through, stop and chill it.
Butter should bend, not break, and it should never smear.
After the folds, wrap the dough and refrigerate it for at least 2 hours. Roll it cold to approximately 3 to 4 mm thick before filling. The final sheet should look smooth, rectangular, and visibly even, with no exposed butter and no rough, greasy patches. Use your eyes and hands, not just the timer. Soft, glossy, or ragged dough needs more fridge time.
For more practical guidance on temperature cues and dough handling, browse Thermomix tips and how-to resources.
Rum Pastry Cream and Assembling the Spirals
Make the pastry cream entirely in the TM7 while the laminated dough chills. Add the whole milk, sugar, salt, vanilla bean paste, egg yolks, and cornstarch to the bowl. Cook:
8 min / 185°F / speed 3
The mixture should thicken into a glossy custard. If it still looks loose, cook:
2 min / 185°F / speed 3
Add the dark rum and mix:
20 sec / speed 3
The rum should be blended through the cream without thinning it into a pourable sauce. Transfer the custard to a shallow container and press plastic wrap directly onto its surface. Chill it until completely cold. A surface covering matters because exposed pastry cream forms a skin, and nobody wants custard flakes in a beautiful spiral.

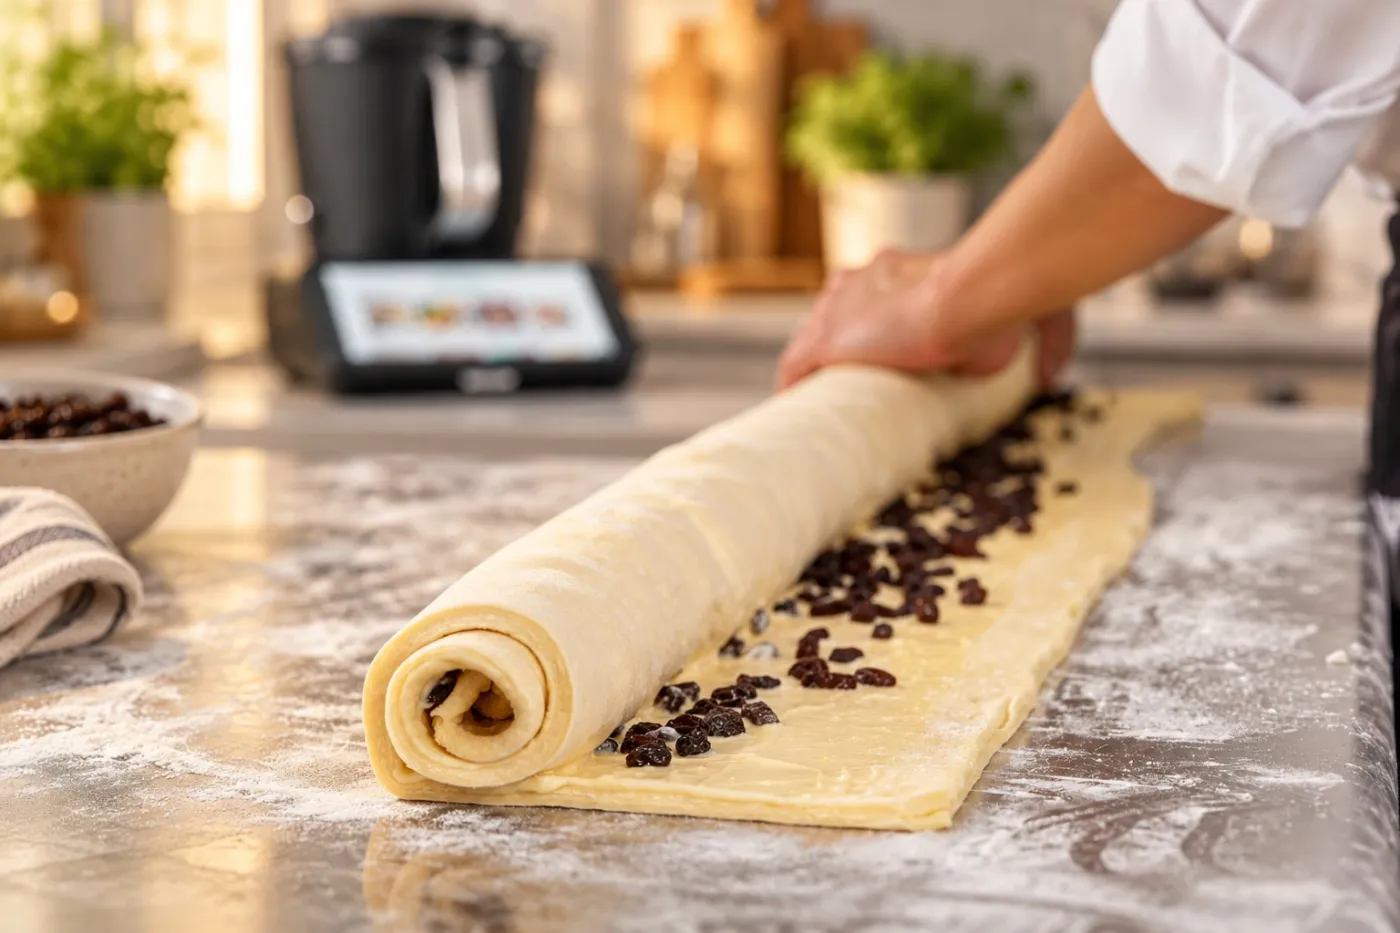
Roll the cold dough to 3 to 4 mm thick. Spread a thin layer of chilled rum pastry cream across the surface, leaving a narrow clean edge along the seam. Scatter the drained raisins evenly from side to side. Don't pile the filling in the center. A thin, balanced layer rolls more cleanly and keeps the spiral from sliding.
Roll the dough firmly from the long edge into a cylinder. Apply enough pressure to remove large air gaps, but don't crush the laminated layers. Wrap the log and chill it until firm. This is the moment to be patient. A cold log gives you cleaner slices and more consistent spirals.
Cut the log into 2 to 3 cm slices with a sharp, lightly floured blade. Use one confident motion rather than sawing back and forth. Arrange the spirals cut-side up on a lined oven tray, leaving room between them for proofing. If a slice looks lopsided, gently nudge the outer coil back into place before it rises.
Proofing, Baking, and Glazing to a Golden Crust
Let the shaped spirals proof at room temperature until they look visibly puffed and gently jiggly. The timing depends on your kitchen, so use appearance as the deciding cue. They should feel alive and airy, not stiff or collapsed.
Whisk the egg wash and brush it lightly over the exposed dough. Too much egg wash pools in the grooves and can make the surface look heavy. Bake in a fully preheated oven at 375°F for 15 to 20 minutes, rotating the tray halfway through. The pastries should be golden, the edges should look set, and the centers should no longer appear wet.
Cool the spirals on a rack so steam doesn't soften the bottoms. If you want a sweeter, shinier finish, prepare a simple rum-sugar glaze in the TM7:
8 min / 212°F / speed 1
Use equal parts sugar and water, then stir in a small splash of rum after heating:
10 sec / speed 2
Brush the warm glaze over the baked pastries. For more visual recipe guidance and demonstrations, visit the Thermomix video library. Serve the pastries warm, or pack them in a box with space between each spiral so the delicate layers don't squash together.
Troubleshooting the Most Common Home Baker Problems
You pull a tray of pain aux raisins from the oven and one spiral has a butter puddle, another looks tight in the center, and a third has raisins trying to break out of the side. That usually traces back to one thing. A missed cue during lamination or shaping. The TM7 handles the mixing and the rum pastry cream in the bowl, but laminated dough still asks you to watch texture, not just follow the clock.
When butter leaks during folding
Likely cause: The butter was too soft, uneven in thickness, or not fully enclosed. If it looks shiny or starts smearing into the dough, it has already gone past the sweet spot.
Fix: Stop right there and chill the packet until the butter feels firm but still flexible. Do not dust on extra flour to soak it up. That only dries the dough and blurs the layers. If your butter block cracks instead of bending, it is too cold. Let it sit briefly, then test it again. For TM7 owners, this is the cue that matters most. The butter should feel plastic, not greasy, and not brittle.
When the spirals bake dense
Likely cause: The dough never built enough strength, the layers were flattened during rolling, or the shaping was too tight. Dense spirals often start with rough handling, not just one bad proof.
Fix: Check the dough before the first long chill. Pull a small piece with your fingers. It should stretch some before it tears. When you roll, use steady pressure from the center outward instead of crushing the rectangle with hard passes. When you shape the log, keep it snug but not strangled. If the coil is wound too tightly, the center stays compact while the outside expands.
When the dough snaps back
Likely cause: The gluten is still tense from mixing or rolling. Sometimes one side also warms faster than the other, which makes the sheet fight you and go crooked.
Fix: Cover it and let it rest in the refrigerator, then come back and roll with lighter pressure. Do not force the rectangle longer by pressing harder. That only shrinks it again and pushes butter into the dough. If one end keeps shrinking, turn the dough and work from the middle toward that end in short strokes.
When pastry cream oozes out
Likely cause: The filling went on too thick, was still warm, or reached too close to the seam. Rum pastry cream made in the TM7 should be cool and spreadable before assembly, not loose.
Fix: Spread a thin layer and leave a clean border at the top edge so the log can seal. If the cream feels soft or warm in the bowl, chill it before using it. A thick ribbon is enough. More filling does not make a better spiral. It usually gives you gaps, slipping, and messy centers.
When raisins sink, burn, or escape
Likely cause: The raisins were too wet, clumped together, or piled near the edge of the dough. Moisture and uneven distribution both work against a clean spiral.
Fix: Drain and dry the raisins well, then scatter them lightly over the chilled pastry cream. Keep them away from the final seam. Press them in gently so they stay in place as you roll. If you notice a heavy patch while slicing, reposition a few pieces instead of hoping the oven will sort it out.
When the crust stays pale
Likely cause: The egg wash was too light, the oven heat was uneven, or the pastries needed more bake time. Pale tops with a tight interior also point to a pastry that never got enough expansion.
Fix: Brush the exposed dough lightly, especially the outer rings, without flooding the grooves. Then bake until the surface is properly golden and the center no longer looks damp. If your tray colors unevenly, rotate it as it bakes and trust the color of the pastry, not just the timer.
Use this quick rescue check before a problem gets worse: leaking butter, snapping dough, loose cream, and misshapen spirals all benefit from a short chill before you continue.
Butter: firm, flexible, and fully enclosed
Dough: stretches a bit, does not fight every roll
Pastry cream: cool, thick, and spread thinly
Raisins: drained, dry, and evenly scattered
Log: snug and sliceable, not squashed
Leftover butter block can be wrapped and frozen for another laminated bake. Finished spirals keep well at room temperature in an airtight container. If you freeze unbaked spirals, thaw and let them finish rising before baking. To serve later, reheat the baked pastries in the oven until the outside crisps again and the layers feel lively, not soft.
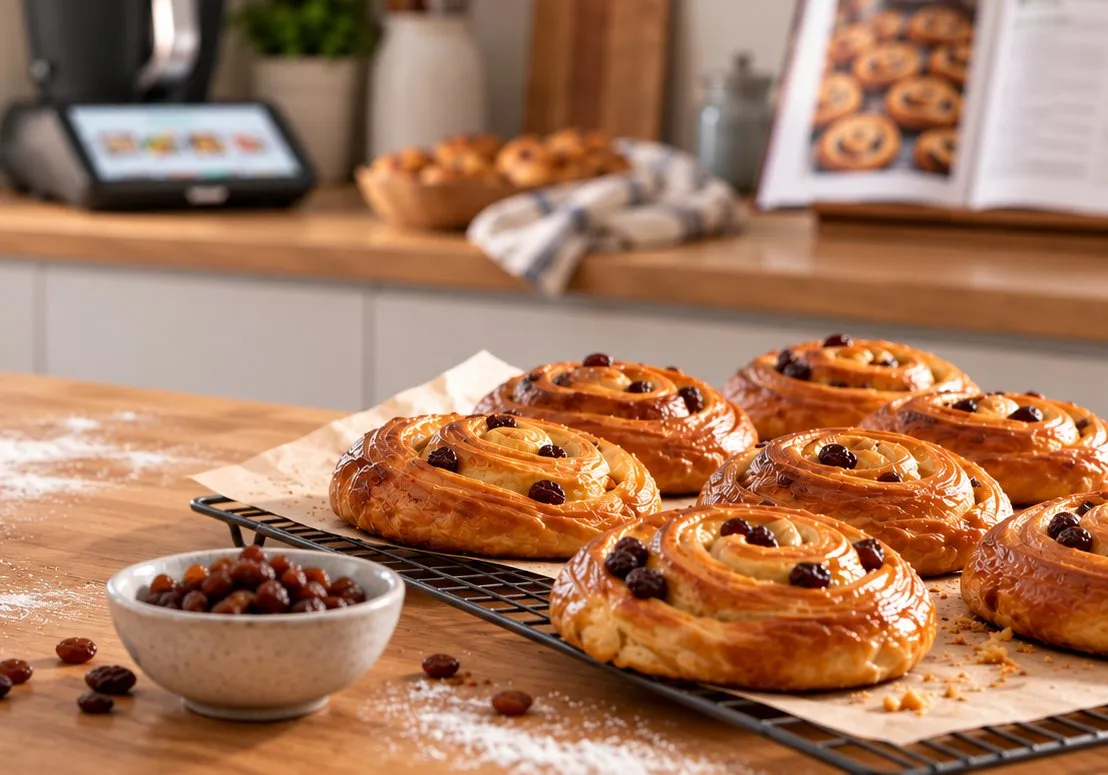
The Thermomix TM7 can take care of the dough mixing, kneading, and rum pastry cream cooking while you focus on the visual cues that laminated dough demands. I'm still Prinal, not a chef, and my honest sign-off is this: reach out through IT'S A CHEF! for a live demo, recipe help, or first-meal setup after delivery.