Thermomix Recipes · October 14, 2026 · 9 min read
How to Make Pan De Molde at Home with Thermomix
Monday morning in my Las Vegas kitchen usually starts the same way. Someone wants toast, someone wants a sandwich, and the loaf I baked the day before is the difference between a calm breakfast and a cereal negotiation.
On this page
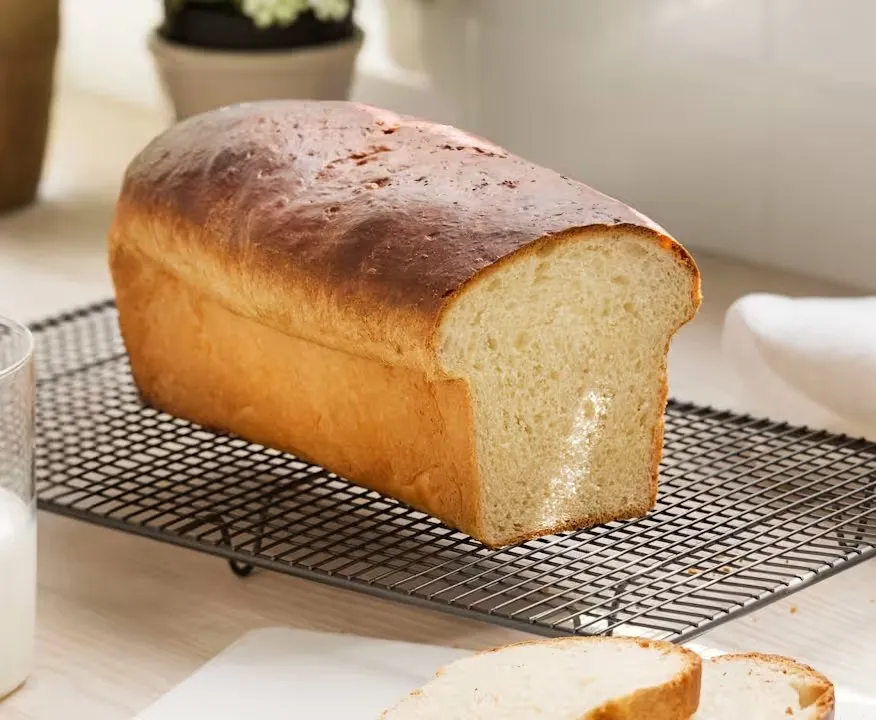
Monday morning in my Las Vegas kitchen usually starts the same way. Someone wants toast, someone wants a sandwich, and the loaf I baked the day before is the difference between a calm breakfast and a cereal negotiation. That's exactly why pan de molde belongs in a real home kitchen, it's a soft, rectangular sandwich loaf that gives you tidy slices, a tender crumb, and less guesswork than a lot of everyday bread.
With the Thermomix TM7, the dough work is the easy part. The machine mixes and kneads, but you still own the parts that matter most for sandwich bread, the shaping, final proof, baking, and slicing. That's where the loaf either turns into neat squares or slumps into a sleepy dome.
Practical payoff: square sandwich slices from a home oven, without mystery preservatives and without praying the crumb cooperates.
If you want a broader sense of whether the machine fits your kitchen style, I'd start with this Thermomix overview, then come back ready to bake. By the end here, you'll know what enriched dough needs, how to judge the final rise, and how to slice without crushing the crumb. I'm keeping everything in US measures and °F, because nobody needs conversion drama before breakfast.
Why Homemade Pan de Molde Is Worth the Effort
Pan de molde became popular because it solves a real kitchen problem. It gives you a soft, rectangular loaf that slices cleanly, packs well in lunch boxes, and holds together in a backpack without turning into a crumb disaster. The commercial side of the story matters too, since sliced bread became standardized when Otto Rohwedder's machine introduced uniform slicing in 1928, and Spain's industrial production followed in 1964 with the country's first industrial sliced-bread company in Granollers, Barcelona.
That history explains the loaf's job in the kitchen. It aims to be reliable, soft, and easy to portion, which is exactly what busy mornings ask for. Making it at home puts that control back in your hands.
What the Thermomix Handles, and What You Still Own
The TM7 handles the mixing and kneading that make bread dough feel less intimidating. You still choose the shape, tighten the surface, and decide when the loaf is ready for the oven. For anyone deciding whether the machine fits their workflow, a quick look at this Thermomix overview helps frame the trade-off before you start baking.
Spain's bread figures show why this loaf keeps showing up at the table. In 2013, sliced bread made up 10.7% of household bread consumption in Spain, up from 9.96% in 2012, and white varieties dominated the category at 77.72% qcom.es. The broader packaged-baking market in Spain later reached €966.6 million in sales and 358,929 tonnes of marketed volume in 2025, with white sliced bread still holding the biggest share democrata.es.
That mix of habit and convenience is the point. A homemade version keeps the familiar sandwich shape, while letting you decide how soft, fresh, and plain-vanilla practical the loaf should be.
Gathering Your Ingredients and Tools
Before the TM7 starts whirring, get everything on the counter. Bread dough moves faster when you aren't digging through a drawer for the loaf pan while the yeast sits there wondering what happened to its big moment.
Pan de Molde Ingredients at a Glance
Ingredient | US Measure | Grams | Role |
|---|---|---|---|
Bread flour | 3 1/2 cups | 420 g | Gives the loaf structure |
Whole milk | 1 cup | 240 g | Adds softness and flavor |
Water | 1/4 cup | 60 g | Loosens the dough |
Instant yeast | 2 1/4 tsp | 7 g | Drives the rise |
Sugar | 2 tbsp | 25 g | Feeds the yeast and balances flavor |
Salt | 1 1/2 tsp | 9 g | Strengthens and seasons |
Unsalted butter, soft | 3 tbsp | 42 g | Enriches the crumb |
Neutral oil, for pan | 1 tsp | 5 g | Keeps the loaf from sticking |
What You Need Beside the Machine
9 x 5 inch loaf pan, for the square shape that gives pan de molde its sandwich character.
Probe thermometer, so you check doneness by temperature, not crust color.
Bench scraper, for moving and tightening the dough cleanly.
Cooling rack, so steam can escape after baking.
Serrated bread knife, which protects the crumb when you slice.
The only thing the machine must do here is mix and knead, and the oven finishes the loaf. Keep the butter soft, not melted, so it blends into the dough instead of making it greasy.
Building the Enriched Dough in the TM7
The dough starts with warmth, not heat. If the milk feels too hot to touch comfortably, it's too hot for yeast, so aim for gently warm liquid, then let the machine do the rest of the organization. Yeast proofing is temperature-sensitive, and dough rises best in a warm, draft-free environment rather than in kitchen chaos King Arthur Baking.
Mix, Then Knead Until the Dough Tells You It's Ready
Add the milk, water, yeast, and sugar to the TM7 bowl, then warm briefly so the yeast has a friendly start. Add the flour, salt, and soft butter, then knead until the dough turns smooth and elastic.
Use a simple workflow like this:
Warm the liquid, 2 min / 100°F / speed 1.
Add yeast and sugar, 20 sec / speed 3.
Add flour, salt, and butter, then knead with the dough function for 2 to 4 min until the dough looks cohesive.
Check the feel, it should be soft, smooth, and just slightly tacky, not sticky enough to smear.
Practical rule: enriched dough needs enough kneading to fully absorb the butter, because the gluten has to stay strong enough to trap the gas later.
That's the difference between bread that slices neatly and bread that tears when you look at it sideways. In enriched dough, the butter makes the crumb tender, but it also slows structure development, so the dough needs a little more attention than a lean loaf. When it's ready, it should pull away from the bowl walls and feel elastic under your fingers.
Dough out, bowl covered, and now it's ready for the part most recipes rush past.
Shaping the Loaf and Final Proof
Pan de molde earns its square look here. If you want sandwich slices with tidy edges, the loaf has to go into the pan under tension, not just dropped in like it gave up on life.
Shape Tight, Not Loose
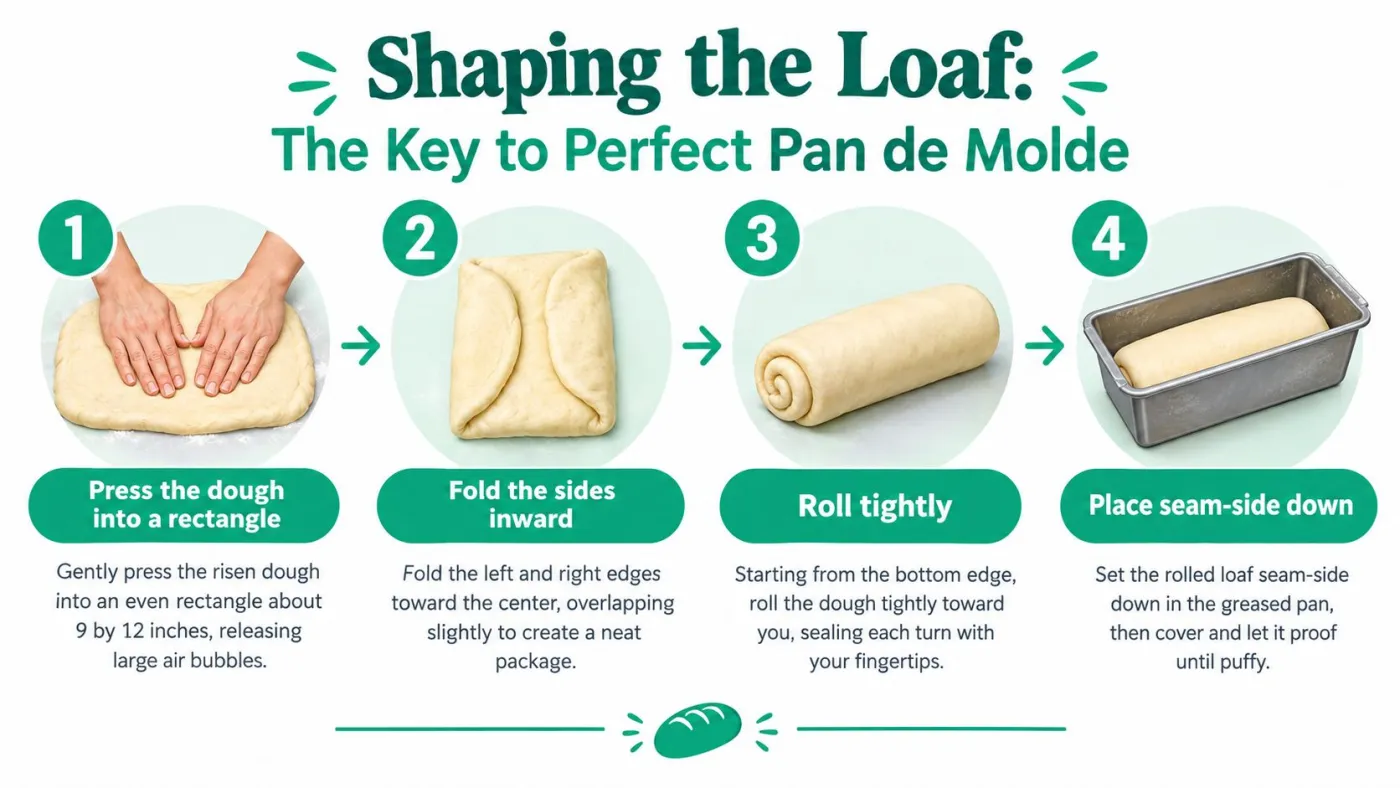
Turn the dough onto a lightly oiled surface and press it into a rectangle. Fold the left and right sides inward, then roll it tightly from the bottom edge so the surface stays smooth and the seam seals cleanly. Tuck the ends just enough that the loaf fits the pan with a little room to expand, then set it seam-side down in the greased loaf pan.
That tight exterior matters because it keeps the loaf from ballooning into a lopsided dome. It also keeps the crumb more even from end to end, which is what gives you sandwich slices that don't collapse under tuna, turkey, or a good smear of butter.
Proof by Look, Not by Clock
Let the shaped loaf rise in a warm, draft-free spot at roughly 75°F to 82°F until it looks puffy and the top sits about 1 inch above the pan rim. Proofing speed changes with dough temperature and room conditions, so a fixed timer can lie to you Bakemag. The loaf is ready when it looks airy but still feels supported, not fragile.
If your kitchen runs cool, a gently warmed proofing spot can help, but the rise itself still belongs to the dough. The TM7 can help you make the dough; it can't make the dough decide it's ready.
Baking, Cooling and Slicing for Sandwiches
Bake the loaf in a fully preheated oven at 375°F until the top is golden and the internal temperature reaches about 190°F to 200°F. Bread doneness is more reliable by internal temperature than by crust color alone, and a browned top can hide a gummy center Baker Bettie. If you want the crumb to hold its shape, don't guess.
Cool It Completely Before You Slice It
Lift the loaf out of the pan and set it on a cooling rack as soon as it's firm enough to handle. Then leave it alone until it's fully cool, because trapped steam is what turns a good crumb soggy inside the wrapper. That cooling step is essential if you want neat slices instead of squashed ones.
Cooling isn't a bonus step. It's the moment the crumb finishes setting.
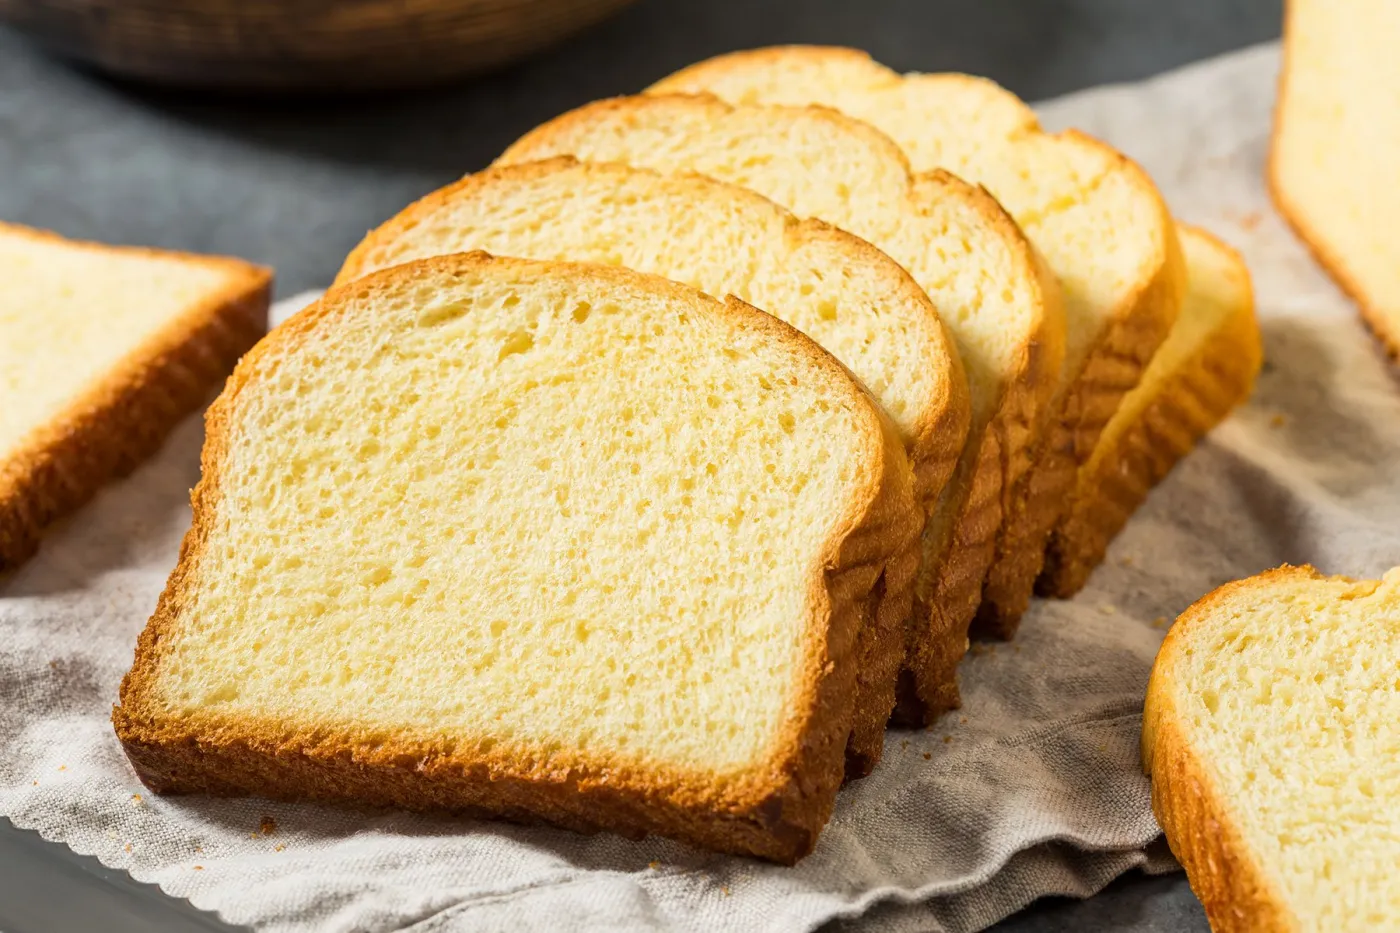
For slicing, use a long serrated bread knife and a gentle sawing motion. Keep the cuts consistent, about 1/2 inch thick for standard sandwiches, and don't press down hard with the blade. Let the knife do the work, and the loaf will reward you by staying square instead of shredding itself into breakfast confetti.
Storing, Freezing and Fixing Common Problems
A good loaf disappears faster when storage is easy. Keep pan de molde in a bread bag at room temperature for a few days, then move to the freezer when you know you won't finish it in time. I'd freeze slices flat first, then bag them, because that gives you single servings for school lunches instead of a frozen brick you have to battle with a knife.
What Usually Goes Wrong
Collapsed sides: the loaf probably over-proofed, so the structure weakened before baking.
Gummy crumb: the loaf likely came out too soon, or it was sliced before it cooled all the way.
Dry texture: the loaf sat too long uncovered, so moisture escaped faster than you wanted.
Refrigeration sounds helpful, but it usually speeds up staling, which is why cold bread often feels dry and stubborn the next day. That's the trade-off I see most often in real kitchens, fresh for longer isn't always softer for longer.
The other waste issue is simple, if you know you'll need sandwiches all week, smaller packs beat one oversized loaf that nobody finishes. That's one of the reasons the storage step matters as much as the shaping step.
For more practical kitchen guidance and workflow ideas, I keep a running set of notes and recipes at IT'S A CHEF! tips and how-to articles, including the kind of small fixes that save a loaf from becoming sandwich regret.
Putting Your Pan de Molde to Work This Week
This is the loaf that makes Monday easier. The TM7 did the mixing and kneading, but the shaping, proofing, and slicing decided whether you got neat sandwich bread or a loaf with attitude. That's the part I always remind busy parents about, because the machine handles the heavy lifting, and you still steer the final result.
A good pan de molde buys you school lunch sandwiches, fast breakfast toast, and a sturdy base for pressed-tuna bites with a slice of tomato. It also makes the week feel less chaotic, which counts for a lot when breakfast is already late and somebody can't find a shoe.
If you want to see the workflow in real time, I offer friends-night demos in Las Vegas and video calls anywhere in the USA. I'm IT'S A CHEF! recipes and updates, and my motto still fits every bread project perfectly, “Thermomix? It's a chef… I'm not!”
If you want hands-on Thermomix guidance for this loaf or the next one, visit IT'S A CHEF!. You'll find practical support, real kitchen demos, and help turning one good bread recipe into a repeatable family routine.